Re: Toyota yaris workshop repair manual
newsgroups.derkeiler.com/...toyota/.../msg015... -
Jenis File: PDF/Adobe Acrobat -
16 Jul 2006 – Re: Toyota yaris workshop repair manual. Source: http://newsgroups.derkeiler.com/Archive/Alt/alt.autos.toyota/2006−07/msg01504.html ...
Re: Toyota yaris workshop repair manual
Re: Toyota yaris workshop repair manual
Source: http://newsgroups.derkeiler.com/Archive/Alt/alt.autos.toyota/2006−07/msg01504.html
• From: mjcooke51@xxxxxxxxxxxxxx
• Date: 16 Jul 2006 07:46:48 −0700
Walter wrote:
Does anyone know were can I download the toyota yaris / echo 2005 workshop
repair manual
−−− including engine section −−−on CD
Thank you
Walter
http://www.sendspace.com/file/2hlp2j
Hope this is what you want.
Get the file Download here
Sunday, September 22, 2013
Toyota Owner's Manual
Re: Toyota Owner's Manual Available in PDF?
Re: Toyota Owner's Manual Available in PDF?
Source: http://newsgroups.derkeiler.com/Archive/Alt/alt.autos.toyota/2007−04/msg00508.html
• From: "Ray O"
• Date: Wed, 4 Apr 2007 17:26:41 −0500
Toyota Tommy wrote:
With all the comments here about consulting Toyota Owner's
Manual. I
got one when I bought my car. However, the Manual isn't
very easy to
search and is really designed
to be read while sitting in your car.
There are a couple of tricks that will help someone quickly search for information in the printed version of the Toyota Owner's Manual. 1) Refer to the table of contents in the front of the book 2) Refer to the index at the back of the book. −− Ray O (correct punctuation to reply)
Get the file Download here
miles toyota Manual Download
miles toyota
brand new
yaris 5 door
1.3L VVT-i, 5 Star NCAP Safety Rating, 9 Airbags,
Anti-lock Braking with EBD & BA.
RRP $23,590
now $18,995
†Based on a 1.3L Yaris 5 door manual hatch excluding on road costs, subject to availability.
great deals on our toP Quality used car range
3 only
save $4,595
†
$86
**
P/week
3 YEARS FREE SERVICING
and WOF CHECKS
are on us with every new Toyota
purchased before 31 December 2010.
So you’ll keep more $$ in your pocket.
toyota 2006
yaris 5dr HatcH
1.3L NZ New, Airbags, ABS, A/C, Alloys,
One Owner in Midnight Metallic.
originally
toyota 2001
corolla 5dr HatcH
1.5L auto, Airbags, ABS, A/C, only
29,000 Certified kms, In Silver Mica,
2 Year Toyota Warranty.
$
14,995
toyota 2001
rav4 3dr wagon
2.0L 5 Speed, Airbags, ABS, A/C,
45,000km certified km, White Pearl
orig $20,995
toyota 2005
Hilux sr5 d/cab 4x4
3.0L DSL, 5 speed, Airbags, A/C, Bull
bars, tuff deck, canopy, good Kms
was $37,995
toyota 2003
Prado vxwagon
3.0L DSL, NZ New, 8 Seater, Airbags,
ABS, A/C, Very Tidy, Good Kms.
orig $39,995
Get the file Download here
Get the file Download here
Free 2005 Toyota Tacoma Access 128" Manual 4WD
2005 Toyota Tacoma Access 128" Manual 4WD (Natl) 7513
VEHICLE DETAILS
SELECTED MODEL - 2005 7513 Access 128" Manual 4WD (Natl)
Code Description Front Wt Rear Wt Invoice MSRP
7513 2005 Toyota Tacoma Access 128" Manual
SELECTED VEHICLE COLORS - 2005 7513 Access 128" Manual 4WD (Natl)
Code Description
- Interior: No color has been selected.
- Exterior 1: No color has been selected.
- Exterior 2: No color has been selected.
SELECTED OPTIONS - 2005 7513 Access 128" Manual 4WD (Natl)
CATEGORY
Code Description Invoice MSRP
EMISSIONS
FE 50-STATE EMISSIONS $0.00 $0.00
OPTION PKG
SL SR5 PKG #2 -inc: chrome grille surround & rear bumper, color-keyed
2,129.00 1,741.00 $18,980.00 $20,690.00
4WD (Natl)
$1,700.00 $2,125.00
front bumper & overfender, metallic tone I/P, upgrade fabric, leather
wheel/shift knob, variable speed wiper, sunvisors w/mirrors & extensions,
pwr windows/locks/mirrors, remote keyless entry, cruise control, sliding
rear window w/privacy glass, drivers seat lumbar support
PAINT
___ STANDARD PAINT $0.00 $0.00
ADDITIONAL OPTIONS
CP CONVENIENCE PKG -inc: pwr windows/locks/ mirrors, remote keyless
WR SLIDING REAR WINDOW INC INC
POST PRODUCTION OPTIONS
S0 FRONT SKID PLATE (N/A w/C8 Convenience Pkg) (PPO) $139.00 $199.00
Report content is based on current data version referenced. Any performance-related calculations are offered solely
as guidelines. Actual unit performance will depend on your operating conditions.
INC INC
entry, cruise control, sliding rear window w/privacy glass
PC Carbook®, Data Version: 155.0, Data updated 10/27/2009 11:53:00 AM
©Copyright 1986-2003 Chrome Systems Corporation. All rights reserved.
Customer File:
December 22, 2009 12:07:44 PM Page 1
2005 Toyota Tacoma Access 128" Manual 4WD (Natl) 7513 VEHICLE DETAILS SELECTED OPTIONS - 2005 7513 Access 128" Manual 4WD (Natl) CATEGORY Code Description Invoice MSRP OPTIONS TOTAL $1,839.00 $2,324.00
Get the file Download here
2005 Toyota Tacoma Access 128" Manual 4WD (Natl) 7513 VEHICLE DETAILS SELECTED OPTIONS - 2005 7513 Access 128" Manual 4WD (Natl) CATEGORY Code Description Invoice MSRP OPTIONS TOTAL $1,839.00 $2,324.00
Get the file Download here
1988 TOYOTA TRUCK & 4RUNNER REPAIR MANUAL INTRODUCTION
1988 TOYOTA TRUCK &
4RUNNER
REPAIR MANUAL
INTRODUCTION Im
MAINTENANCE m
ENGINE MECHANICAL EIB
TURBCCHARGER SYSTEM
EMISSICN CONTROL SYSTEMS
EFI SYSTEM
FUEL SYSTEM
cooLlNG SYSTEM
LuBRlcATloN SYSTEM
|GMT|0N SYSTEM
STARTlNG SYSTEM
CHARGING SYSTEM
CLUTCH
MANUAL TRANSMISSION
AUTOMATIC TRANSMISSION
TRANSFER
PROPELLER SHAFT Iii]
FRoNT AxLE AND SUSPENSION
REAR AxLE AND SUSPENSION EE
BRAKE SYSTEM IEB]
BODY ELECTRICAL SYSTEM lää
BODY Im]
AIR CONDITIONING SYSTEM
STEERING E2]
Get the file Download here
Get the file Download here
Free TOYOTA TUNDRA 3.4L 2/4WD INSTRUCTION MANUAL
INSTRUCTION MANUAL
CAT-BACK SINGLE EXHAUST
TOYOTA TUNDRA 3.4L 2/4WD
TOYOTA TUNDRA 4.7L 2/4WD
Double Cab, Short Bed, Access Cab, Short Bed
PART #618602
ITEM PART # QTY DESCRIPTION
A 379-700250S 1 2 ½” STAINLESS HEADPIPE
B 788500S 1 SUPERFLOW STAINLESS MUFFLER
C 648-700503S 1 2-1/2”STAINLESS OVERAXLE TAILPIPE
D 378-700251S-B 1 2-1/2” STAINLESS EXIT TAILPIPE
E 500374 1 3-1/2" STAINLESS TIP
F 40095 1 O.E. HANGER/REAR MUFFLER
G 5757 2 2 ½" CLAMP
Thank you for purchasing our GIBSON EXHAUST SYSTEM for your vehicle. If you
need further assistance, please do not hesitate to call our Technical Department at
1-800-528-3044, Monday through Friday, 8:00 am to 5:00 PM
INSTALLATION INSTRUCTIONS
WHEN INSTALLING THE GIBSON EXHAUST SYSTEM, MAKE SURE TO USE PROPER SAFETY PRECAUTIONS. USE
JACKSTANDS WHEN UNDER THE VEHICLE, SET PARKING BRAKE,BLOCK THE TIRES,AND USE SAFETY GLASSES
AND GLOVES. DO NOT WORK WITH HOT PIPES!!
SUGGESTED TOOLS
9/16” SOCKET,12 MM SOCKET, ½” SOCKET,½” WRENCH, JACKSTANDS,HACKSAW, WD-40
LAY OUT THE GIBSON EXHAUST AND MATCH THE PIPE NUMBERS TO THE NUMBERS ON THE PARTS LIST MANUAL.
REMOVE STOCK EXHAUST
BY UN-CLAMPING THE
STOCK CLAMP AT THE
HEADPIPE. BE CAREFUL NOT
TO DAMAGE THIS CLAMP
BECAUSE YOU NEED TO REUSE IT. ONCE IT IS UNCLAMPED, YOU WILL BE
ABLE TO PULL THE STOCK
EXHAUST OFF THE
VEHICLE. MAKE SURE ALL
FACTORY RUBBER
GROMMETS ARE STILL IN
FACTORY LOCATION. USE
WD-40 TO AID YOU IN
REMOVAL OF THE HANGERS
FROM THE GROMMETS.
NEXT INSTALL REAR
MUFFLER HANGER #F
ONTO OUTLET OF
MUFFLER. INSERT
HANGERS INTO RUBBER
GROMMETS. DO NOT
TIGHTEN.
INSTALL THE GIBSON
HEADPIPE #A. MAKE SURE
THE HEADPIPE IS
STRAIGHT. YOU MAY WANT
TO GENTLY TAP THE END
OF THE HEADPIPE TO
ENSURE A TIGHT FIT.
CLAMP DOWN THE FACTORY
CLAMP AT THE FRONT OF
THE HEADPIPE. DO NOT
TIGHTEN.
SLIP OVERAXLE PIPE #C
INTO THE OUTLET OF THE
MUFFLER NO MORE THEN 2”
AND NO LESS THEN 1 ½”.
THE SPARE TIRE MAY NEED
TO BE LOSENED AND
PUSHED TO THE REAR OF
THE TRUCK TO GAIN
CLEARANCE FOR
INSTALLATION OF
OVERAXLE PIPE. INSERT
WELDED HANGER INTO
RUBBER GROMMET.
NEXT, SLIP THE MUFFLER #B ONTO THE HEADPIPE NO MORE THAN 2” AND NO LESS THAN 1 ½”. ATTACH TO HEADPIPE WITH CLAMP #G.
Get the file Download here
NEXT, SLIP THE MUFFLER #B ONTO THE HEADPIPE NO MORE THAN 2” AND NO LESS THAN 1 ½”. ATTACH TO HEADPIPE WITH CLAMP #G.
Get the file Download here
2003 Camry Owners Manual PDF
TOYOTA TIMELINE
Issue/Incident
Date
2003 The My 2003 Camry Owners Manual warns that the installation of a
mobile two-way radio system could affect electronic systems,
including the electronic throttle control system, etc.
3/3/03 NHTSA advised Toyota it was doing a preliminary investigation of
the Camry to determine if the throttle system could be the cause of
SUA’s.
5/27/03 A Massachusetts resident filed a defect petition for his 1999 Lexus
LS 400 and multiple episodes of SUA.
7/17/03 NHTSA starts investigation 1997-2000 Lexus LS 400’s, G’s and
400’s for SUA
9/23/03 NHTSA – says info, gathered on Lexus cars do not indicate they are
over represented with SUA’s or vehicle speed control problems.
11/19/03 Camry owner reports SUA incident with a 2002 Camry to the
NHTSA in July 2003 and it was not investigated further.
2/17/04 Another Lexus owner filed a defect complaint for multiple episodes
of SUA’s and she noted 37 other instances similar to hers to the
NHTSA.
9/03-4/04 8 deaths with SUA reported to NHTSA with 2002 to 2004 Camrys.
7/22/04 NHTSA filed a closing report of the Camrys and SUA’s. They had
July-August
2004
narrowed their definition of SUAs which eliminated a number of
events of SUA’s and concluded there was no real data to support a
problem.
Lexus dealers in Canada complained about the Lexus ES 330’s
accelerator problems possible related to the electronics systems.
These documents came to light in a 2006 lawsuit filed by a Toronto
couple whose 2004 Lexus ES 330 crashed into a tree. Toyota blamed
the driver for the crash. Dealers were told that the problem would go
away once the electronic acceleration controls learned to recognize
the driver’s habits.
8/5/05 NHTSA opens an investigation of 2002-2005 Toyota Camry Toyota Solara and Lexus ES 11/15/05 Toyota filed a response that their systems have multiple redundancies and the electronic throttle could not malfunction without error being caught and therefore can’t cause SUA.
Get the file Download here
Free Toyota Complimentary Maintenance Program Manual PDF
the Toyota Complimentary
Maintenance Program - TCMP
When you purchase or lease a new 2009, 2010 or 2011 model
year Toyota between January 5 and March 1, 2010 your Toyota
will be covered under the Toyota Complimentary Maintenance
Program. The TCMP entitles your vehicle, for a period of
24 months or 48,000 kms*, complimentary Toyota quality
service and maintenance, as outlined at toyota.ca or in the
Recommended Maintenance section of your Owner’s Manual
Supplement. In addition to the scheduled maintenance, Toyota
Canada will also cover up to 2 tire rotations and 1 engine air
filter replacement, plus other recommended services, based
on your Toyota model, as required, during the length of the
program period.
Toyota quality service, Toyota Genuine Parts, factory-trained
technicians and complimentary service…trust only the experts
with your new vehicle, after all, we service your Toyota the way
we built it.
*whichever occurs first
Kaizen
is continuous improvement
We thank you for choosing Toyota.
And we will repay your trust in us by promising you this:
When you bring your vehicle to Toyota for service
the job will be done right. It will be done efficiently.
It will be done to your complete satisfaction.
And only expertly trained Toyota Team Members
will ever touch your vehicle.
Our commitment is to you,
and this is our promise
We service your Toyota the way we built it.
With pride, professionalism and a commitment to kaizen.
the Toyota Complimentary
Maintenance Program offers some
very distinct benefits:
• Helps ensure that your Toyota vehicle continues to deliver the
consistent, incomparable performance you expect
• All services are performed by factory-trained and certified
Toyota technicians
• Only Toyota Genuine Parts will be used, thus maintaining
the inherent integrity of your Toyota
• Helps ensure that your Toyota resale value is enhanced. Should
you decide to sell your Toyota, the Toyota Complimentary
Maintenance Program remains with the vehicle.
Toyota also offers ECP Extra Care Protection for additional peace of
mind motoring beyond your new vehicle warranty. Ask your Product
Advisor for details.
Toyota reserves the right to extend, change or terminate the Toyota
Complimentary Maintenance Program without notice. Consult your
Toyota Dealership for details. TCMP available at participating dealers.
Some exclusions may apply.
complimentary maintenance program essentials • Factory recommended maintenance schedule up to 24 months/48,000 km, whichever occurs first • Oil and filter service every 6 months/8,000 km • Maintenance service every 12 months/16,000 km* • Additional specific model services
Get the file Download here
complimentary maintenance program essentials • Factory recommended maintenance schedule up to 24 months/48,000 km, whichever occurs first • Oil and filter service every 6 months/8,000 km • Maintenance service every 12 months/16,000 km* • Additional specific model services
Get the file Download here
1990-1995 TOYOTA 4RUNNER 2 & 4WD WITH MANUAL TRANSMISSION BODY LIFT KIT INSTALLATION INSTRUCTIONS
Ä WARNING
This body lift kit should only be installed on vehicles that are in
good working condition. Before the installation begins, the
vehicle should be thoroughly inspected for evidence of corrosion
0r deformation of the sheet metal around the factory body
mounts. This body lift kit should not be installed on any vehicle
that is suspected to have been in a collision, or misused. Off road
use of your vehicle with this body lift installed may increase the
stress applied to the factory body mounts. It is not recommended
that any vehicle, with a body lift installed, be involved in any
extreme off road maneuvers. Failure to follow this warning may
result in serious personal injury and/or serious damage to your
vehicle.
TOYOTA 4RUNNER 2 & 4WD
WITH MANUAL TRANSMISSION
BODY LIFT KIT
INSTALLATION INSTRUCTIONS
1990-1995 2” KIT# 5512
À WARNING
Performance Accessories strongly discourages the use of a
suspension lift kit or any other lift device in addition to a body lift
kit. A vehicle that uses a combination of lift devices not originally
engineered to be used together may result in unexpected and
unsafe handling characteristics. Many states now have laws
restricting bumper heights and vehicle lifts. Local laws should be
consulted to determine if the changes you intend to make to your
vehicle comply with state laws.
A WARNING
The installation of larger wheel and tire combinations may reduce
the effectiveness of the Anti-lock Braking System.
Installation of a Performance Accessories body lift will change the
center of gravity and the handling characteristics of the vehicle.
Because of the higher center of gravity and larger tires, the vehicle
will handle and react differently both on and off road. You must
drive it safely! Extreme care must be taken to prevent vehicle
rollover or loss of control, which could result in serious injury or
death. Avoid sudden sharp turns or abrupt maneuvers and always
make sure all vehicle occupants have their seat belts fastened.
Ä NOTE
Performance Accessories recommends using the Loctite@
supplied in the kit, on all hardware unless noted in the
instructions.
¿à WARNING
Read and understand all instructions, warnings, cautions, and
notes in this sheet and in your owner’s manual before you begin
the installation of this body lift kit.
I Ä WARNING
l Always wear eye protection when operating power tools.
1. Read the instructions completely and carefully before you begin. Check the kit for proper contents (refer to the part’s list and picture diagrams. If anytime during the installation you encounter something different from what is outlined in the instructions, call technical support. (928) 636-3175, 0r visit our web site at
Get the file Download here
Free 1966 Toyota 700 User Manual
1966 Toyota 700
User Manual
Bodywork
Type 4/5S SAL
Doors 2
Engine information
Bore × stroke 78.00 mm × 73.00 mm 3.07 in × 2.87 in
Cylinders F-2
Displace 0.7 litre 698 cc (42.595 cu in)
Engine type OHC
Valves 2 valves per cylinder | 4 valves in total
Engine construction
Sump Wet sumped
Compression ratio 8.00:1
Fuel system
Maximum power
0-50 mph
0-60 mph
0-100 mph
0-100 km/h
80 - 120 km/h
402 m (Quarter mile)
Standing km
Top speed 110 km/h (68 mph)
Fuel consumption
CO2 emissions
Power to weight ratio 59.83 bhp/ton
Specific output
Maximum torque
Bmep 1062.2 kPa (154.1 psi)
Specific torque 84.53 Nm/litre
Maximum rpm
Code
Main bearings
Coolant Air Bore / stroke ratio 1.07 Unitary capacity 349 cc/cylinder Aspiration Normal Compressor type N/A Intercooler None Catalytic converter N Dimensions and weight Wheelbase 2130 mm Wheelbase 83.9 in Length (milimeters) 3570 mm Length (inches) 140.6 in Width (milimeters) 1415 mm Width (inches) 55.7 in Height (milimeters) 1380 mm Height (inches) 54.3 in L:W ratio 1.68 Ground clearance (milimeters)
Get the file Download here
Free 2006 Toyota Allion A18 User Manual
2006 Toyota Allion A18
User Manual
Bodywork
Type 4/5S SAL
Doors 4
Engine information
Bore × stroke 79.00 mm × 91.50 mm 3.11 in × 3.6 in
Cylinders S-4
Displace 1.8 litre 1794 cc (109.477 cu in)
Engine type DOHC
Valves 4 valves per cylinder | 16 valves in total
Engine construction
Sump Wet sumped
Compression ratio 10.00:1
Fuel system EFi
Maximum power
0-50 mph
0-60 mph
0-100 mph
0-100 km/h
80 - 120 km/h
402 m (Quarter mile)
Standing km
Top speed
Fuel consumption
CO2 emissions
Power to weight ratio 111.11 bhp/ton
Specific output
Maximum torque
Bmep 1190.8 kPa (172.7 psi)
Specific torque 94.76 Nm/litre
Maximum rpm
Code 1ZZ-FE
Main bearings
Coolant Water
Bore / stroke ratio 0.86
Unitary capacity 448.5 cc/cylinder
Aspiration Normal
Compressor type N/A
Intercooler None
Catalytic converter Y
Dimensions and weight
Wheelbase 2700 mm
Wheelbase 106.3 in
Length (milimeters) 4565 mm
Length (inches) 179.7 in
Width (milimeters) 1695 mm
Width (inches) 66.7 in
Height (milimeters) 1470 mm
Height (inches) 57.9 in
L:W ratio 1.69
Ground clearance (milimeters) 160 mm
Ground clearance (inches) 6.3 in
Kerb weight (kilograms) 1170 kg
Kerb weight (pounds) 2579 lb
Weight distribuiton
Fuel capacity (litres) 60 litres
Fuel capacity (UK Ga) 13.2 UK Ga
Fuel capacity (US Gal) 15.9 US Gal
Aerodynamics
Drag coefficient
Frontal area
Cx
Chassis
Engine location Front
Engine alignment Transverse
Drive FWD
Steering rack & pinion
Turns lock-to-lock
General information RAC rating 15.5 Number made Model code DBA-ZZT240-CEPEK Model family Insurance classification No information available Tax band No information available
Get the file Download here
General information RAC rating 15.5 Number made Model code DBA-ZZT240-CEPEK Model family Insurance classification No information available Tax band No information available
Get the file Download here
Download 2006 Toyota Auris 180G 4WD User Manual
2006 Toyota Auris 180G 4WD
User Manual
Bodywork
Type 4/5S HBK
Doors 5
Engine information
Bore × stroke 80.50 mm × 88.30 mm 3.17 in × 3.48 in
Cylinders S-4
Displace 1.8 litre 1798 cc (109.721 cu in)
Engine type DOHC
Valves 4 valves per cylinder | 16 valves in total
Engine construction
Sump Wet sumped
Compression ratio 10.00:1
Fuel system EFi
Maximum power
0-50 mph
0-60 mph
0-100 mph
0-100 km/h
80 - 120 km/h
402 m (Quarter mile)
Standing km
Top speed
Fuel consumption
CO2 emissions
Power to weight ratio 91.24 bhp/ton
Specific output
Maximum torque
Bmep 1160.2 kPa (168.3 psi)
Specific torque 92.32 Nm/litre
Maximum rpm
Code 2ZR-FE
Main bearings
Coolant Water
Bore / stroke ratio 0.91
Unitary capacity 449.5 cc/cylinder
Aspiration Normal
Compressor type N/A
Intercooler None
Catalytic converter Y
Dimensions and weight
Wheelbase 2600 mm
Wheelbase 102.4 in
Length (milimeters) 4220 mm
Length (inches) 166.1 in
Width (milimeters) 1760 mm
Width (inches) 69.3 in
Height (milimeters) 1530 mm
Height (inches) 60.2 in
L:W ratio 1.62
Ground clearance (milimeters) 140 mm
Ground clearance (inches) 5.5 in
Kerb weight (kilograms) 1370 kg
Kerb weight (pounds) 3020 lb
Weight distribuiton
Fuel capacity (litres) 50 litres
Fuel capacity (UK Ga) 11 UK Gal
Fuel capacity (US Gal) 13.2 US Gal
General information RAC rating 16.1 Number made Model code DBA-ZRE154H-BHXEK Model family Insurance classification No information available Tax band No information available
Get the file Download here
General information RAC rating 16.1 Number made Model code DBA-ZRE154H-BHXEK Model family Insurance classification No information available Tax band No information available
Get the file Download here
Tuesday, July 2, 2013
Disclaimer
Web Site Terms and Conditions of Use
1. Terms
By accessing this web site, you are agreeing to be bound by these web site Terms and Conditions of Use, all applicable laws and regulations, and agree that you are responsible for compliance with any applicable local laws. If you do not agree with any of these terms, you are prohibited from using or accessing this site. The materials contained in this web site are protected by applicable copyright and trade mark law.
2. Use License
A. Permission is granted to temporarily download one copy of the materials (information or pictures) on pictures artist’s web site for personal, non-commercial transitory viewing only. This is the grant of a license, not a transfer of title, and under this license you may not:
* modify or copy the materials;
* use the materials for any commercial purpose, or for any public display (commercial or non-commercial);
* attempt to recompile or reverse engineer any software contained on pictures artist’s web site;
* remove any copyright or other proprietary notations from the materials; or
* transfer the materials to another person or “mirror” the materials on any other server.
B. This license shall automatically terminate if you violate any of these restrictions and may be terminated by Pictures Artist at any time. Upon terminating your viewing of these materials or upon the termination of this license, you must destroy any downloaded materials in your possession whether in electronic or printed format.
3. Disclaimer
A. The materials on www.ownermanualspdf.blogspot.com are provided “as is”. Manual Guide makes no warranties, expressed or implied, and hereby disclaims and negates all other warranties, including without limitation, implied warranties or conditions of merchantability, fitness for a particular purpose, or non-infringement of intellectual property or other violation of rights.
Further, http://pdf-manuals.blogspot.com/ does not warrant or make any representations concerning the accuracy, likely results, or reliability of the use of the materials on its Internet web site or otherwise relating to such materials or on any sites linked to this site.
For further information, please feel free to contact us on k24owners@gmail.com
Privacy Policy
This is the web site of Online Manual Guide.
Our postal address is not needed to conduct business. All queries should be sent to k24owners@gmail.com
We can be reached via e-mail at k24owners gmail.com. For each visitor to our Web page, our Web server automatically recognizes only the consumer’s domain name, but not the e-mail address (where possible).
We collect only the domain name, but not the e-mail address of visitors to our Web page. The information we collect is used for internal review and is then discarded, used to improve the content of our Web page, used to customize the content and/or layout of our page for each individual visitor, , disclosed when legally required to do so, at the request of governmental authorities conducting an investigation, to verify or enforce compliance with the policies governing our Website and applicable laws or to protect against misuse or unauthorized use of our Website.
With respect to cookies: We do not set any cookies.
If you do not want to receive e-mail from us in the future, please let us know by sending us e-mail at the above address.
From time to time, we make the e-mail addresses of those who access our site available to other reputable organizations whose products or services we think you might find interesting. If you do not want us to share your e-mail address with other companies or organizations, please let us know by calling us at the number provided above.
From time to time, we make our customer e-mail list available to other reputable organizations whose products or services we think you might find interesting. If you do not want us to share your e-mail address with other companies or organizations, please let us know by calling us at the number provided above.
If you supply us with your postal address on-line you will only receive the information for which you provided us your address.
Persons who supply us with their telephone numbers on-line will only receive telephone contact from us with information regarding orders they have placed on-line.
Please provide us with your name and phone number. We will be sure your name is removed from the list we share with other organizations
With respect to Ad Servers: To try and bring you offers that are of interest to you, we have relationships with other companies that we allow to place ads on our Web pages. As a result of your visit to our site, ad server companies may collect information such as your domain type, your IP address and clickstream information. For further information, consult the privacy policies of:
www.google.com
From time to time, we may use customer information for new, unanticipated uses not previously disclosed in our privacy notice. If our information practices change at some time in the future we will contact you before we use your data for these new purposes to notify you of the policy change and to provide you with the ability to opt out of these new uses.
Customers may prevent their information from being used for purposes other than those for which it was originally collected by e-mailing us at the above address.
Upon request we provide site visitors with access to all information [including proprietary information] that we maintain about them.
Consumers can access this information by e-mail us at the above address.
Consumers can have this information corrected by sending us e-mail at the above address.
With respect to security: and No data on any of our users will be collected, hence security is a non-issue at http://pdf-manuals.blogspot.com
If you feel that this site is not following its stated information policy, you may contact us at the above address.
About Us
We are personal log,this content site is a Manual Guide. The following user manuals are available in ZIP or PDF format. User manuals are also available in French, German, Italian, Japanese and Spanish.
Wednesday, June 12, 2013
TOYOTA Forklift 7FGC8000-15 500 CUSHION pdf
 ■ O.K. Monitor
■ High mount Pre-Cleaner for air intake
■ Box-fin radiator
■ Cooling fan booster
■ Sealed alternator (standard with LPS)
■ Tapered forks
■ Fully tapered and polished forks
■ Various load backrest extension heights
■ Various carriage widths
■ Adjustable dB Smart Alarm
■ Combination inching/brake pedal
(standard with EZ-Pedal option)
■ Wide tread tires (8,000 lb. model only)
■ 12V-60A high capacity alternator
■ OHG mounted pencil & tape holder
■ Operator compartment light
■ Tilt cylinder boots
■ Dual element Cyclone air cleaner
You can Download TOYOTA Forklift 7FGC8000-15 500 CUSHION pdf Manual Below. If the information you are looking for less, you can use the sponsored links to get related information
Get the file Download here
Get the file Download here
TOYOTA Forklift 7fgcu 8000-15500 CUSHION pdf

The bar is raised. The industry is forever changed.
The revolutionary 7-Series forklifts feature the world’s first
System of Active Stability™ (SAS) – which helps reduce the
risk of forklift accidents. Once again, Toyota ingenuity and
engineering have been combined to introduce new and
dramatic advancements in design.
Advancements not limited to new safety features, but including
overall lift truck operation and performance, as well. As a
result, Toyota is driving the world toward a safer, more productive workplace by expanding the 7-Series cushion line-up
to 15,500 lb. capacity and 12,000 lb. capacity Boxcar Special
models. This is exactly the kind of thinking you should expect
from a leader, along with a level of quality that is unique to
Toyota Industrial Equipment.
You can Download TOYOTA Forklift 7fgcu 8000-15500 CUSHION pdf Manual Below. If the information you are looking for less, you can use the sponsored links to get related information
Get the file Download here
TOYOTA Forklift 7 SERIES CUSHION 3000-6500 pdf
 NOBODY SAID IT WAS GOING TO BE EASY.
THEN AGAIN, THEY DIDN’T HAVE A 7-SERIES. C O N V E N I E N C E EASE OF SERVICE
Routine maintenance is quicker and easier, thanks to the
7-Series’ many ease-of-service features.
Integrated monitoring system reports on all important vehicle
information, including SAS system status. It also includes
a digital hourmeter; water temperature and gasoline fuel
level gauge; plus indicator lights for clogged air cleaner
warning, oil pressure warning and charge warning;
SAS and Swing Lock Cylinder.
Easy-lift hood features a convenient, wide-access
design and an assist damper for quick engine
access. The damper automatically holds the hood
in a raised position.
No-tool floorboard removes in a matter of seconds
for fast, easy service access.
Swing-out or optional swing-down LP tank bracket
makes switching LP tanks quick and easy. Back strain
is reduced because the operator does not have to reach
over the counterweight.
RadialSeal™ high-flow, 2-stage air cleaner features an easy-to-change filter for faster servicing.
Extensive pleated surface area offers tremendous dirt-trapping capability.
You can Download TOYOTA Forklift 7 SERIES CUSHION 3000-6500 pdf Manual Below. If the information you are looking for less, you can use the sponsored links to get related information
Get the file Download here
Get the file Download here
TOYOTA 7FGU-FDU 8000-17500 Forklift pdf

revolutionary 7-Series forklifts feature the world’s first System
of Active Stability (SAS) – which helps reduce the risk of
forklift accidents. Once again, Toyota ingenuity and
engineering have been combined to introduce new and
dramatic advancements in design. Advancements not limited
to new safety features, but including overall lift truck
operation and performance, as well. As a result, Toyota is
driving the world toward a safer, more productive workplace
by expanding the 7-Series line-up to 17,500 lb. capacity. This
is exactly the kind of thinking you should expect from a
leader, along with a level of quality that is unique to Toyota
Industrial Equipment.
The same legendary manufactuing quality that distinguishes Toyota cars and
trucks is built into every Toyota forklift.
You can Download TOYOTA 7FGU-FDU 8000-17500 Forklift pdf Manual Below. If the information you are looking for less, you can use the sponsored links to get related information
Get the file Download here
TOYOTA Forklift 8 SERIES PNEU 1-3.5 TON pdf
 The Mastery of True Potential
Mastery of any undertaking can only be achieved if there is true potential
and unwavering dedication to excellence. To Toyota, the 8 Series is the
proud culmination of 50 years in the pursuit of mastery in the development
and manufacture of forklifts.
All who experience the level of mastery in the 8 Series will be inspired to
reach for higher goals.
Here, Toyota integrated outstanding comfort and excellent operability into
a operator’s compartment that realizes operator friendliness. The 8 Series
is also equipped with high technology that contributes to the creation of a
safe workplace.
You can Download TOYOTA Forklift 8 SERIES PNEU 1-3.5 TON pdf Manual Below. If the information you are looking for less, you can use the sponsored links to get related information
Get the file Download here
TOYOTA 7 SERIES ELECT 3000-6500 pdf

with the AC (Alternating Current) drive system. It’s an
achievement that enhances Toyota’s overall product range and
redefines the electric forklift market . The 7-Series electric
forklifts are uniquely designed and engineered to improve
performance, productivity and safety in a way never before
accomplished. Fact is, Toyota is the first major manufacturer to
introduce an electric forklift of this caliber in the United States.
Yet the AC drive motor isn’t the only milestone component
driving these remarkable products. The world’s first System of
Active Stability™ (SAS) shares the spotlight as, quite possibly,
the single-most important breakthrough in the history of forklift
design and safety. These two industry-leading technologies
combine to create a forklift that is not classified by mere
N E X T G E N E R A T I O N
weight capacity alone, but also by the way it elevates
operator productivity and workplace safety to
unprecedented levels. Because, at the end of the day,
all that truly matters is the health and well-being of
your employees and your company.
You can Download TOYOTA 7 SERIES ELECT 3000-6500 pdf Manual Below. If the information you are looking for less, you can use the sponsored links to get related information
Get the file Download here
Toyota Forklift 7 SERIES ELECT 8000-12000 pdf

MORE POWER TO MOVE THOSE LARGER LOADS.
When you operate the remarkable 7FBCU electric
forklift, chances are, your first response will be,
"Is this really an electric forklift?"
The 7FBCU electric forklift
with an AC (Alternating Current)
drive system is thoughtfully
designed to deliver quicker acceleration, higher top
speeds and longer-lasting power. As a result, its
performance seems more comparable to an
internal combustion forklift than an ordinary
DC powered electric.
Available in both
36 and 48 volt electric power
systems, the 7FBCU is nothing short of
an engineering marvel. It's the result of persistent
A C D R I V E S Y S T E M
curiosity, proven technology and breakthrough
design – all driven by a single vision: to create a
superior-performing electric forklift that helps
boost productivity and reduce operating costs.
Mission accomplished.
The 7FBCU features the revolutionary Power
Keep Function, the cornerstone of these large
electrics. Using advanced power regeneration
You can Download Toyota Forklift 7 SERIES ELECT 8000-12000 pdf Manual Below. If the information you are looking for less, you can use the sponsored links to get related information
Get the file Download here
TOYOTA 2000-6000LBS PNEUMATIC SPECS pdf

You can Download TOYOTA 2000-6000LBS PNEUMATIC SPECS pdf Manual Below. If the information you are looking for less, you can use the sponsored links to get related information
Get the file Download here
TOYOTA 2000-6000LBS PNEUMATIC BROCHURE pdf
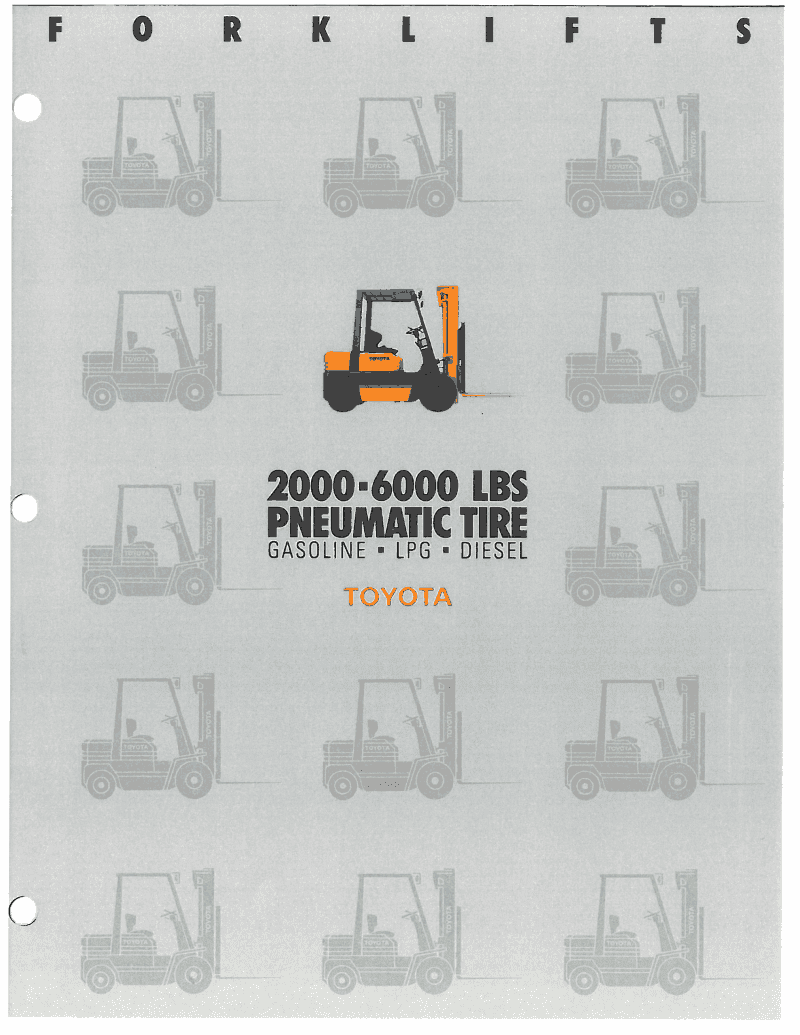
lift brings Toyota quality t0
materiels-handling in the
2000 to 6000-pound category. A
Toyota has designed _this hard
Working forklift for improved man-
euverebility, excellent visibility and
an overall level ot operating ease.
Toyota forklifts otter superb qualïty
as well as all the latest advances
in materials-handling technology
That translates directly into easy
planned maintenance and excel-
lent reliability. For materials-
handling jobs that need to be put
in their place tast, this Toyota
forklift is a oost-effective choice.
You can Download TOYOTA 2000-6000LBS PNEUMATIC BROCHURE pdf Manual Below. If the information you are looking for less, you can use the sponsored links to get related information
Get the file Download here
TOYOTA FORKLIFT BATTERY
TOYOTA FORKLIFT MODEL V TOTAL
BATTERY O BATTERY X Y Z BATTERY
COMPARTMENT L MODEL # in. in. in. WEIGHT
SIZE (Inches) T Ah kWh (Length) (Width) (Height) (Lbs.)
Class 1
5FBCU15 (36v/34"L) 36 V 18-85-17 680 23.9 33.1 25.6 22.9 2142
34.60 26.80 23.00
N/Cov. SB350Gry Connector: 1840 Min. Weight: Term: B16 4 Wheel-Sit down Trk dims:
CAPACITY
6 HOUR
RATE
BATTERY DIMENSIONS
5FBCU15 (48v/34"L) 48 V 24-85-13 510 23.9 30.6 25.4 22.9 2256
34.60 26.80 23.00
N/Cov. SB350Gry Connector: 1840 Min. Weight: Term: B16 4 Wheel-Sit down Trk dims:
You can Download TOYOTA FORKLIFT BATTERY Manual Below. If the information you are looking for less, you can use the sponsored links to get related information
Get the file Download here
Toyota Forklifts Introduced (Toyota: The Industrial Engine Experts A Proven Record of Success)
Toyota has a strong history, starting in 1926 when Toyoda Automatic Loom Works Co., Ltd., now known as Toyota Industries Corporation, was established. Just eight years later Toyota’s first automobile engine was produced: the A-type.
f With more than 150 million engines produced since 1934, Toyota is certainly seasoned in producing quality engines — but not just for automobiles.
Toyota Forklifts Introduced
f In 1956, Toyota began manufacturing engines for industrial usage, such as lift trucks.
f The success and reputation generated from these highly reliable engines served as the
foundation for Toyota Material Handling, U.S.A., Inc. (TMHU) not only becoming the nation’s No. 1
lift truck supplier since 2002, but also retaining that title for the last eight years running.
f Toyota is the world’s best-selling lift truck brand.
You can Download Toyota Forklifts Introduced Manual Below. If the information you are looking for less, you can use the sponsored links to get related information
Get the file Download here
Toyota Forklift TOYOTA 7FGU PNEUMATIC 8000-15500 LB pdf
OPERABILITY AND ERGONOMICS
■ Ergonomically designed instrument display
■ Integrated monitoring system
– Digital hour meter
– Battery charge warning lamp
– Engine coolant temperature gauge
– Engine oil pressure warning lamp
– Clogged air filter warning lamp
– Fuel gauge (gasoline/diesel only)
– SAS warning lamp
– Swing lock cylinder activation lamp
■ Automatic fork leveling
■ Memory tilt steering column
■ Two spoke steering wheel
You can Download Toyota Forklift TOYOTA 7FGU PNEUMATIC 8000-15500 LB pdf Manual Below. If the information you are looking for less, you can use the sponsored links to get related information
Get the file Download here
Toyota Forklift 7FGCU35-70 Manual PDF

■ GM 4.3L, 262 ci V6 gasoline engine
■ Planetary drive axle
■ Centralized Hydraulic Power System(CHPS)
– Power brakes
– Hydrostatic power steering
– Hydraulic functions
■ Hydraulic valve lifters
■ Reverse-phase type 2 stator torque converter
– 4 element, 2-stage, 3-phase type
– 8:1 torque multiplication
You can Download Toyota Forklift 7FGCU35-70 Manual Below. If the information you are looking for less, you can use the sponsored links to get related information
Get the file Download here
Toyota Forklift 7FGU15-32 Manual PDF
7-Series’ powertrain is powerful enough to meet- and exceed the
demands of your workpiece.
Toyota’s EPA and CARB compliant 2.2-Iiter, gasolinefLPGfCNG engine
features maintenance-free hydraulic valve iifters and an integrated ignition
system to help maximize uptime. A engine is also avaiiable,
which provides a 12% increase in power, for added performance over the
Standard engine. The 2_5-liter, 1DZ-II diesel engine also delivers powerful
performance for all your outdoor appîîcations.
As part of the performance package, Toyota's powershîft transmission
includes an electrìc shifter for smooth transitìons between forward and
reverse (one speed in forward and reverse, or optìonal two speeds in forward
and one in reverse for 4000-6500 lbs capacity models). The full-fioatîng
powerti'ain is designed to reduce vibration and engine noise.
You can Download Toyota Forklift 7FGU15-32 Manual Below. If the information you are looking for less, you can use the sponsored links to get related information
Get the file Download here
Toyota Forklift 7FGCSU20 4,000 – 5,000 lbs. Mast Specifications and Manual PDF
3,000 – 6,500 lbs. Optional Equipment
■ Travel Speed Control System
■ High mount rear combination lights
– clearance back-up lights
■ EZ-Pedal foot directional control
■ Engine shutdown device
■ Plate fin radiator (Box fin pattern)
■ Radiator screen
■ Fire extinguisher
■ Wide-view full free lift 2-stage mast
■ Wide-view full free lift 3-stage mast
■ Wide-view full free lift 4-stage mast
(QFV) (7FGCU20.25.30.32)
■ Keyless ignition switch
■ Front combination lights
– clearance lights
– turn signal
■ Tilt cylinder boots
■ Polished and tapered forks
■ Side-shifter attachment
■ Bottler’s tilt
■ LPG low-fuel warning light and alarm
■ Catalytic muffler
■ High capacity alternator with built-in regulator
■ Strobe lights
– yellow– red– blue– clear
■ Step mounted tool box with cover
■ Back-up alarms
■ 4-way cloth semi-suspension seat
■ 3-way full-suspension seat
■ Combination brake/inching pedal
■ Pre-cleaner for air intake
■ Left- and right-hand rear-view mirrors
■ Wide tread tires
■ UL “GS” gasoline model
■ 4Y-ECS gasoline engine (option on 7FGCU20.25.30.32)
■ LPG fuel system configurations with swing out tank bracket and one touch latch system
– UL-LP
– UL-LPS
– UL-LP/G dual fuel
■ Optional swing down feature for LPG tank bracket
You can Download Toyota Forklift 7FGCSU20 Manual Below. If the information you are looking for less, you can use the sponsored links to get related information
Get the file Download here
Sunday, May 19, 2013
Jaguar S-Type Drive Belt Noise After Cold Start –Supercharger –Revised Drive Belt Available
Drive Belt Noise After Cold Start –Supercharger –Revised Drive Belt Available
On some 2003-04 MY S-TYPE vehicles within the above VIN range, customers may
have a concern with noise from the supercharger drive belt after a cold start.
A revised drive belt has been released to address this concern.
You can Download Jaguar S-Type Drive Belt Noise After Cold Start Manual Below. If the information you are looking for less, you can use the sponsored links to get related information
Get the file Download here
Jaguar S-Type Thump From Rear Of Vehicle –Differential Mount Bushings –Install Bushing Inserts
Thump From Rear Of Vehicle –Differential Mount Bushings –Install Bushing Inserts
Remove and destroy Bulletin S100-10, dated 03/04.
Replace with this Bulletin.
An ending VIN has been added.
On some 2003-04 MY S-TYPE vehicles within the above VIN range, customers may
have concerns of the following:
• On manual transmission vehicles, a thump from the rear of the vehicle when
changing gear.
• On automatic transmission vehicles, thump from the rear when accelerating after a
period of deceleration.
To address this concern, two inserts have been released to restrict mounting bushing
movement. These inserts fit into the bushings that support the rear of the differential in
the subframe.
In case of a verified customer complaint of the above condition, install the two inserts
following the procedure below.
WORKSHOP PROCEDURE
1. Raise vehicle on ‘four-post’ lift.
Working on the left-side rear differential mounting bushing:
2. Place a suitable protective material on the front face of the spare wheel well behind
the left-side bushing, to prevent damage to the spare wheel well while it is being
levered against.
Date of issue 03/04 Amended 07/04 Bulletin Number S100-10 Page 1 of 5
ILLUSTRATION 1
3. Use a suitable adhesive tape to secure the protective material into position
(Illustration 1).
Do not use any other lubricant as this can cause
damage to the rubber bushing material.
4. Lubricate upper void of left bushing with suitable tire lubricant. If this is not
available, water can be used.
ILLUSTRATION 2
5. Position insert into upper void of left bushing (Illustration 2).
You can Download Jaguar S-Type Thump From Rear Of Vehicle Manual Below. If the information you are looking for less, you can use the sponsored links to get related information
Get the file Download here
Jaguar S-Type Steering Wheel Vibration-Revised Power Assisted Steering Rack
Issue:
On some 2001-2002 MY S-TYPE vehicles within the above VIN range, customers may
complain of a steering wheel vibration. A new Power Assisted Steering (PAS) rack
incorporating a modified mechanism to improve center feel has been introduced.
Action:
When all other steering vibration causes have been eliminated, (e.g. out of balance
wheels - as per Technical Bulletins S204-07 and S204-09) and all possible mechanical
causes have been addressed, a new modified PAS rack should be installed. On a
customer complaint basis only, follow the workshop procedure outlined below.
Note: Replacement of the PAS rack for any other concerns must be
carried out using the normal replacement PAS racks as appropriate.
Note: The improvement to the PAS rack is designed to eliminate slight
shimmy that may be felt at the steering wheel and is not designed to
compensate for other influences.
WORKSHOP PROCEDURE
1. Disconnect battery (see Workshop Manual, JTIS CD ROM, section: 414-01).
2. Install new PAS rack (see Workshop Manual, JTIS CD ROM, section: 211-02, SRO
57.10.01).
3. Connect battery (see Workshop Manual, JTIS CD ROM, section: 414-01).
You can Download # Manual Below. If the information you are looking for less, you can use the sponsored links to get related information
Get the file Download here
Jaguar S-Type Service Technical Bulletin

The cooling systems of all S-TYPE vehicles are filled with “Extended Life Coolant” (XLC)
which can be identified by its distinctive orange color. Identification label are mounted to
the cooling system header tanks.
It is important that vehicles filled with the XLC are not topped off with coolants such as
D542 or D985 used on earlier Jaguar vehicles.
Mixing D542 or D985 into XLC will seriously reduce the long-life properties of the XLC
and will have a negative effect on the corrosion protection properties of the coolant.
XLC conforms to specification WSS-M97B44-D.
Action:
Ensure that only XLC is added to S-TYPE cooling systems when topping off is
necessary.
You can Download Jaguar S-Type Service Technical Bulletin Manual Below. If the information you are looking for less, you can use the sponsored links to get related information
Get the file Download here
Friday, May 3, 2013
2013 Camaro Coupe INSTRUMENT PANEL PDF

Review this Quick Reference Guide for an overview of some important features in your Chevrolet Camaro.
More detailed information can be found in your Owner Manual. Some optional equipment described in this
guide may not be included in your vehicle. For easy reference, keep this guide with your Owner Manual in
your glove box.
REMOTE VEHICLE STARTF
During a remote start, the vehicle’s climate control system will operate at the same setting
as when the vehicle was last turned off and, based on outside temperature, the heated
seats will turn on. The heated seats will turn off when the ignition is turned on.
Starting the Vehicle
1. Aim the Remote Keyless Entry transmitter at the vehicle. (Transmitter range depends on
operating conditions.)
2. Press and release the Lock button on the transmitter.
3. Immediately press and hold the
Remote Start button for at least two seconds.
When the vehicle starts, the parking lamps will light and remain on while the engine is
running. The engine will continue running for 10 minutes.
4. Repeat these steps for a 10-minute time extension. Remote start can be extended
only once.
After a remote start, the ignition must be turned to the On position before driving.
Canceling a Remote Start
Press and hold the
Remote Start button until the parking lamps turn off.
Note: Several conditions will cause the Remote Vehicle Start feature not to operate, such as if the
key is in the ignition or the hood or doors are not closed.
You can Download 2013 Camaro Coupe INSTRUMENT PANEL PDF Manual Below. If the information you are looking for less, you can use the sponsored links to get related information
Get the file Download here
2013 Chevrolet Camaro Coupe Owners Manual PDF

General Information . . . . . . . . . . 10-3
Vehicle Checks . . . . . . . . . . . . . . . 10-4
Headlamp Aiming . . . . . . . . . . . 10-36
Bulb Replacement . . . . . . . . . . 10-37
Electrical System . . . . . . . . . . . . 10-41
Wheels and Tires . . . . . . . . . . . 10-49
Jump Starting . . . . . . . . . . . . . . . 10-85
Towing . . . . . . . . . . . . . . . . . . . . . . 10-88
Appearance Care . . . . . . . . . . . 10-89
Service and Maintenance . . . 11-1
General Information . . . . . . . . . . 11-1
Maintenance Schedule . . . . . . . 11-2
Special Application
Services . . . . . . . . . . . . . . . . . . . . 11-8
Additional Maintenance
and Care . . . . . . . . . . . . . . . . . . . . 11-9
Recommended Fluids,
Lubricants, and Parts . . . . . . 11-12
Maintenance Records . . . . . . . 11-16
You can Download 2013 Chevrolet Camaro Coupe Owners Manual Below. If the information you are looking for less, you can use the sponsored links to get related information
Get the file Download here
Download 2013 Chevrolet Avalanche Owners Manual PDF

In Brief
A. Air Vents on page 8‑9.
B. Turn and Lane-Change Lever. See Turn and Lane-Change Signals on page 6‑5.
Windshield Wiper/Washer on page 5‑4.
C. Instrument Cluster on page 5‑10.
D. Hazard Warning Flashers on page 6‑5 (Out of View).
E. Shift Lever. See Automatic Transmission on page 9‑29.
F.Tow/Haul Mode on page 9‑33 (If Equipped).
G. Driver Information Center (DIC)
Buttons. See Driver Information
Center (DIC) on page 5‑25.
H. AM-FM Radio on page 7‑10. Exterior Lamp Controls on page 6‑1.
I.
J. Dome Lamp Override. See Dome Lamps on page 6‑7. Instrument Panel Illumination Control on page 6‑7. Fog Lamps on page 6‑6 (If Equipped).
K. Automatic Transfer Case Control (If Equipped). See Four-Wheel Drive (Single Speed Automatic Transfer Case) on page 9‑39 or Four-Wheel Drive (Two Speed Automatic Transfer Case) on page 9‑34.
L. Data Link Connector (DLC) (Out of View). See Malfunction Indicator Lamp on page 5‑17.
M. Cruise Control on page 9‑47.
N. Steering Wheel Adjustment on page 5‑2.
O. Horn on page 5‑4.
P.Steering Wheel Controls on page 5‑2.
Q. Climate Control Systems on page 8‑1 (If Equipped).
Dual Automatic Climate Control System on page 8‑4 (If Equipped).
R. Power Outlets on page 5‑8.
S. StabiliTrak® System on page 9‑43.
Pedal Adjust Control. See Adjustable Throttle and Brake Pedal on page 9‑21.
Ultrasonic Parking Assist on page 9‑49.
Power Assist Steps on page 2‑15 (If Equipped).
You can Download 2013 Chevrolet Avalanche Owners Manual Below. If the information you are looking for less, you can use the sponsored links to get related information
Get the file Download here
2014 Chevrolet Impala Infotainment System Manual PDF

For vehicles with high gloss surfaces or vehicle displays, use a microfiber cloth to wipe surfaces. Before wiping the surface with the microfiber cloth, use a soft bristle brush to remove dirt that could scratch the surface. Then use the microfiber cloth by gently rubbing to clean. Never use window cleaners or solvents. Periodically hand wash the microfiber cloth separately, using mild soap. Do not use bleach or fabric softener. Rinse thoroughly and air dry before next use.
Steering Wheel Controls
The infotainment steering wheel controls can be used to control the infotainment features displayed in
the instrument cluster.
You can Download 2014 Chevrolet Impala Infotainment System Manual PDF Manual Below. If the information you are looking for less, you can use the sponsored links to get related information
Get the file Download here
2014 Chevrolet Impala Owners Manual PDF

Chevrolet Motor Division wherever it appears in this manual.
Keep this manual in the vehicle for quick reference.
Initial Drive
Information
This section provides a brief overview about some of the important features that may or may not be on your specific vehicle.
For more detailed information, refer to each of the features which can be found later in this owner manual.
Remote Keyless Entry
(RKE) System
The Remote Keyless Entry (RKE) transmitter may work up to 60 m (195 ft) away from the vehicle.
You can Download 2014 Chevrolet Impala Owners Manual PDF Manual Below. If the information you are looking for less, you can use the sponsored links to get related information
Get the file Download here
Thursday, May 2, 2013
Jaguar S-TYPE Enhancement Program – Service Action S120 PDF
Action:
Check the vehicle for an S120 Authorized Modification Label (Illustration 1) located on
the left B-post below the striker. Perform this update on all vehicles, within the
applicable VIN ranges, prior to delivery in the case of all unsold vehicles, and at the first
service opportunity/next dealer visit in the case of all vehicles already in service.
MODIFICATION
AUTHORIZED MODIFICATION LABEL
DA
WRITE IN DATE
WRITE IN DEALER NUMBER
ILLUSTRATION 1
Refer to the following chart to determine which updates are applicable to a specific VIN.
You can Download Jaguar S-TYPE Enhancement Program Manual Below. If the information you are looking for less, you can use the sponsored links to get related information
Get the file Download here
Jaguar S-Type Engine Oil Manual – Viscosity/Temperature Chart Manual
USA/CANADA ILLUSTRATION 1
Use engine oil that meets or exceeds API SJ/EC and ILSAC GF2. SAE 5W/30 is the
preferred engine oil in most climate conditions although SAE 5W/40 is acceptable in
moderate to hot conditions. Synthetic oils can be used, but must follow the same
viscosity guidelines in the chart.
MEXICO ONLY
V8 Engines
Use engine oil that meets or exceeds API SJ/EC and ILSAC GF2. Vehicles for the
Mexico market must use fully synthetic oils of the following viscosities:
•5W-40, 5W-50
•10W-40, 10W-50
•15W-40, 15W-50
V6 Engines
Use engine oil that meets or exceeds API SJ/EC and ILSAC GF2. Follow the
specifications shown in the chart (Illustration 1) on the previous page. It is not
necessary for V6 engines to use synthetic oil, since they are equipped with oil coolers.
Synthetic oils can be used, but must follow the same viscosity guidelines in the chart.
You can Download Jaguar S-Type Engine Oil Manual Below. If the information you are looking for less, you can use the sponsored links to get related information
Get the file Download here
2002 Jaguar S100-02 Passenger Air Bag Warning Label – Mandatory Installation PDF
prior to sale:
•Ensure that the passenger airbag warning label is attached in a prominent position
on the front of the glovebox lid, as illustrated below, so that the label will be fully
visible to the customer.
•In French-speaking regions of Canada, the label should be reversed, so that the
French text faces outwards.
•Should the label be missing or damaged, supply and attach a new label.
POSITIONING AIR BAG WARNING LABEL
It may be necessary to cut a small ‘V’ notch in the label, Illustration 1, to provide a
positive location for the elastic strap.
POSITIONING AIR BAG WARNING LABEL
You can Download 2002 Jaguar S100-02 Manual Below. If the information you are looking for less, you can use the sponsored links to get related information
Get the file Download here
Jaguar S-TYPE Sedan Service Tools required PDF
Issue:
The Service Tools required for the S-TYPE Sedan are listed below, which are all a
mandatory requirement and are indicated by bold type.
These tools were previously shipped to dealers for the S-TYPE launch.
Service Tools which are already a mandatory requirement for the XK8 and V8 XJ Series
and which are also required for the S-TYPE Sedan are indicated as ‘XK8 and V8 XJ
Series Tool’ in plain type.
The Service Tools are listed by the global group number (as in the Workshop Manual/
JTIS) with an illustration and brief description of their usage.
FRONT SUSPENSION (SECTION 204-01)
204-112-02 Front/Rear Damper Spring
Assembly Compressor Adapter
The Adapter fits the lower cup of the spring
assembly and is held by the lower fingers of
204-112, Road Spring Compressor. The
upper fingers of the Compressor engage
with the spring coils.
JSI.3561
100-019-01 Adapter Base Plate for 100-
019 Hand Press
The Adapter replaces the base plate of the
Hand Press.
You can Download Jaguar S-TYPE Sedan Service Tools required PDF Below. If the information you are looking for less, you can use the sponsored links to get related information
Get the file Download here
2000 Jaguar S-Type (X200) V6-3.0L Manual PDF
Welcome GUS GLIKAS
Leading source of Online Diagnostic & Repair Information
Your Vehicle: 2000 Jaguar S-Type (X200) V6-3.0L
Vehicle » Technical Service Bulletins » All Technical Service Bulletins » A/C - Does Not Cool Sufficiently
Notes
A/C - Does Not Cool Sufficiently
No: JTB00183
Issue: 1
Date: 07 JAN 2010
SECTION: 412
Air Conditioning System Not Cooling Sufficiently
AFFECTED VEHICLE RANGE
CONDITION SUMMARY:
5/10/2011 2:13 PM
ALLDATAdiy.com - 2000 Jaguar S-Type (X200) V6-3.0L - A/C - Does Not Cool Sufficiently
http://www.alldatadiy.com/alldata/AFI~V25909924~C40453~R0~OD2~N/0/77993956/780414...
Situation:
The air conditioning (A/C) system may exhibit insufficient cooling. This may be due to the degradation of control valve operation, preventing the system from delivering full
functional potential.
Action:
In the event of a customer concern of the above, refer to the Repair Procedure outlined below, after confirming correct refrigerant level, to modify the compressor valve spring.
You can Download 2000 Jaguar S-Type (X200) V6-3.0L Manual PDF Below, After Specifications. If the information you are looking for less, you can use the sponsored links to get related information
Get the file Download here
Jaguar S-Type TECHNICAL BULLETIN PDF Unable to Reduce Climate Control Outlet Temperature - Diagnostic Procedure
TECHNICAL BULLETIN
7. Using a suitable temperature gauge, record the outlet temperature from both the driver and
passenger air distribution vents. Recorded temperatures should be 7qC (45qF).
8. If the recorded temperatures are within 6qC (10qF? of each other, the climate control system is operating
normally and no additional diagnosis is necessary.
9. If either of the recorded temperatures are greater than 45qF or the difference between the recorded
temperatures is greater than 6qC (10qF?, continue the Diagnostic Procedure.
10. Shut engine off.
CAUTION: A Midtronics PSC-550 Vehicle Power Supply must be connected to the vehicle
battery during diagnosis.
1. Connect the Midtronics PSC-550 Vehicle Power Supply to the vehicle battery.
NOTE: IDS must be loaded with software release DVD112 Patch File 1 or later.
2. Connect the IDS to the vehicle and begin a new diagnostic session by entering the correct VIN for the
current vehicle.
3. Select 'No' when prompted 'Do you wish to read configuration information from the vehicle?'.
4. Select 'No' when prompted 'Do you wish to read diagnostic trouble codes?'
5. Select 'Tick' to continue.
6. Select 'Toolbox' when the 'Content Model' is
Figure 1
displayed.
7. Select 'Digital Multimeter' from the menu.
8. Select 'Tick' to continue.
9. Select 'A' (amps) button.
10. Set scale to mA.
11. Remove the left-hand fascia end-panel.
VIN L00600 - M45254 ONLY
12. Place the IDS current clamp around the brown/green
(NG; FC5-11) wire at connector FC5. (Figure 1)
VIN M45255 - N91220 ONLY
13. Place the IDS current clamp around the brown/green
Figure 2
(NG; FC4-9) wire at connector FC4. (Figure 2)
14. Start the engine.
15. Using the Dual Automatic Temperature Control
(DATC), select:
x 'RECIRC' and 'PANEL' modes
16. Move the temperature from 'HIGH' to 'LOW'.
17. Record the current reading.
18. Move the temperature from 'LOW' to 'HIGH'.
19. Record the current reading.
You can Download Jaguar S-Type TECHNICAL BULLETIN PDF Below, After Specifications. If the information you are looking for less, you can use the sponsored links to get related information
Get the file Download here
Jaguar S-Type Ticking / Bubbling Noise From Behind Fascia / Instrument Panel Manual PDF
SECTION: 412
Ticking / Bubbling Noise From Behind Fascia / Instrument Panel
AFFECTED VEHICLE RANGE:
S-TYPE (X200)
CONDITION SUMMARY:
Situation: A ticking or bubbling noise may be heard coming from behind the fascia / instrument panel when
using the climate control system. The noise may be the result of one or more of the climate control blend
door actuators giving incorrect position feedback to the climate control module, causing the blend doors to
continually search for their correct position and causing the noise.
Action: In the event of a customer concern of the above, refer to the Repair Procedure outlined below to
replace all four blend door actuators.
PARTS:
XR8 57885 ..............Defrost vent / register blend door actuator
XR8 57886 ...............Footwell vent / duct blend door actuator
XR8 57887 ...............Instrument panel blend door actuator
XR8 57888 ...............Recirculation blend door actuator
TOOLS:
Refer to Workshop Manual (GTR) for any required special tools
WARRANTY:
NOTE: Repair procedures are under constant review, and therefore times are subject to change;
those quoted here must be taken as guidance only. Always refer to DDW to obtain the latest repair
time.
DDW requires the use of causal part numbers. Labor only claims must show the causal part number with a
quantity of zero.
VIN: N53000 - N91220
Model Year: 2006 - 2008
Description
SRO
82.91.32
Replace blend door actuators
Normal warranty policy and procedures apply.
REPAIR PROCEDURE
REPLACE THE BLEND DOOR ACTUATORS
NOTE: Global Technical Reference (GTR) lookup sequence is as follows:
GTR Home > NAS > X200 - S-TYPE > Service Information > Model Year > Workshop Manual
1. Refer to Workshop Manual (GTR) section 412-04, Recirculation Blend Door Actuator (82.20.67), and
remove the recirculation blend door actuator.
2. Refer to Workshop Manual (GTR) section 412-04, Footwell Vent / Duct Blend Door Actuator (82.20.20), and
remove the footwell vent / duct blend door actuator.
You can Download Jaguar S-Type Below, After Specifications. If the information you are looking for less, you can use the sponsored links to get related information
Get the file Download here
Jaguar S-Type JTB00040NAS2 - Harsh Transmission Shifts or Noise During Shifts

TECHNICAL BULLETIN
Version 2 of this bulletin replaces previously published bulletins JTB00040 & JTB00030
PARTS
NOTE: The additive must only be used in the following cases:
•To fix a transmission noise during gearshifts (squawk).
•It must only be used once in a transmission. The exception to the "use once" rule is if
the transmission has had a complete fluid change, where a second application may be
used on a customer complaint of transmission squawk.
NOTE: The additive must not be used in the following circumstances:
•It must not be used in an attempt to fix any other transmission concerns, for example
noises other than squawk, harsh transmission shifts, or Diagnostic Trouble Codes
(DTC) logged in the transmission control module.
•The additive must not be used on any cars from 2006 MY onwards starting with VINS
S-TYPE: N52048, XJ Range: H00332, New XK: ALL vehicles.
•The additive must not be used more than once in a transmission apart from the
exception described in the second bullet of the NOTE above.
•Do not use the additive as a preventative measure. It must not be used unless there is
transmission noise during gearshifts (squawk) present.
•Do not add the fluid during initial oil fill when a new or remanufactured transmission is
installed.
•The effects of using the additive incorrectly as outlined above may be reduced friction
of the clutches leading to poor shift quality, logged DTCs, and it can also induce flare.
C2C 37157...............Transmission fluid additive Qty 1
ou can Download Jaguar S-Type Below, After Specifications. If the information you are looking for less, you can use the sponsored links to get related information
Get the file Download here
Download PDF Jaguar XK Owners Manual

The Jaguar XK series (XK, XK8 and XKR) is a series of grand tourer cars produced by British car maker Jaguar since 1996. The series was introduced at the Geneva Motor Show on 5 March 1996. The first generation of the series, the XK8, replaced the XJS, and was available as a coupé and convertible. The XK8 was the first 8-cylinder vehicle produced by Jaguar, when the Jaguar AJ-V8 engine was introduced.
from: wikipedia
You can Download PDF Jaguar XK Owners Manual Below, After Specifications. If the information you are looking for less, you can use the sponsored links to get related information
Get the file Download here Europe
Get the file Download here North America
Free Jaguar XF Owners Manual

IMPORTANT
The information contained in this handbook covers all vehicle derivatives and optional equipment,
some of which will not be fitted to your vehicle. Due to printing cycles this handbook may include
descriptions of options before they become generally available.
If your vehicle is to be used in another geographical area, the vehicle may have to be modified to
suit local conditions. Jaguar Cars is not responsible for the cost of any modifications.
The information contained in this publication was correct when it went to print. Subsequent vehicle
design changes may result in a supplement being added to the literature pack. Updates can also be
viewed on the Jaguar Cars internet site at http:/www.ownerinfo.jaguar.com.
In the interest of development, the right is reserved to change specifications, design or equipment
at any time without notice and without incurring any obligations. This publication, or part thereof,
may not be reproduced nor translated without our approval. Errors and omissions excepted.
You can Download Jaguar XF Owners Manual Below, After Specifications. If the information you are looking for less, you can use the sponsored links to get related information
Get the file Download here Europe
Get the file Download here North America
Subscribe to:
Posts (Atom)